Forget those large traditional charcuterie platters, these fun handheld Charcuterie Jars (aka jarcuterie) are a fancy appetizer for smaller, more personal get-togethers! They're made to be served individually in cute little glass jars rather than a free-for-all board.
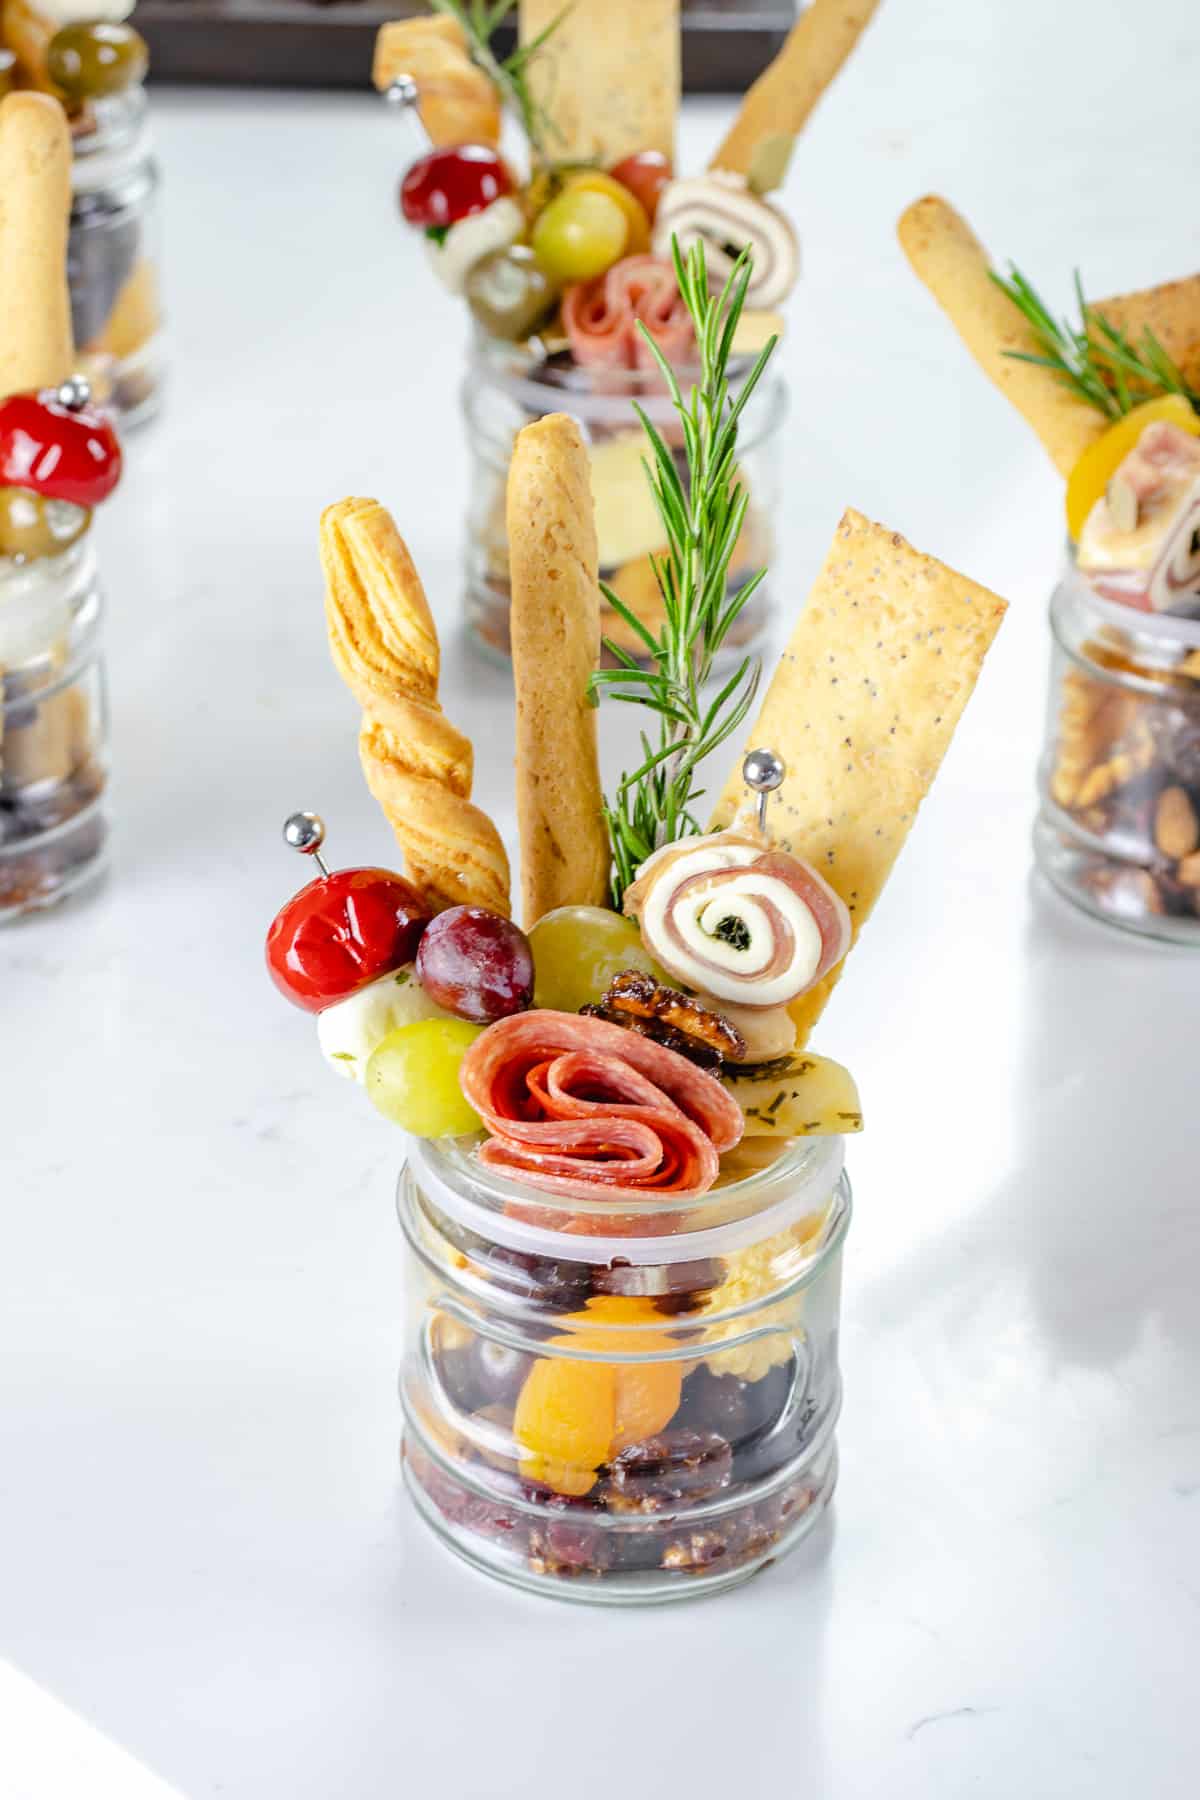
Suzanne Billings popularized the concept during the pandemic, which I will admit is genius! Pandemic or not, I think giving your guests a snack to carry as they walk around is always a fun way to serve food!
Watch Aleka Assemble Her Jars!
How To Assemble Charcuterie Cups
First, you need the right equipment! The first two are a must. The cookie cutters are optional.
- Get Your Jars/Cups/Cones- Look for small mason jars that are at least 8 ounces. But don't go spending an arm and a leg. I got these from the dollar store so check there first! They usually have a great selection. Opt for individual jars on the larger side so you can fit in enough nibbles. These jars are a great option!
- You can also use CONES for a fun twist.
- You can also use PLASTIC CUPS which are also inexpensive.
- Skewers- These are for skewering your olives, cheeses and meats. Here are some wooden ones. Here are the metal skewers I used in the photos. Cocktail sticks work too.
- Cookie Cutters- These are to cut your cheeses or meats into fun shapes like stars, hearts or even Christmas trees! Here are some mini cutters you will love.

What To Put In A Charcuterie Cup
Here are some snacks that are common on a cheese board that would be great in your jarcuterie cups.
✔ Nuts- Walnuts, pecans, almonds, cashews and pistachios are all great! These candied pecans would be a great addition!
✔ Seeds- Pumpkin seeds or sunflower.
✔ Fruit- Grapes, figs, prunes, cherries, blueberries, strawberries or blackberries (any berries really) pair best.
✔ Veggies- Other than peppers, I did not add any veggies since they are not typically on a charcuterie board but grape tomatoes or peppers would work nicely.
✔ Meats- Cured Italian deli meats like salami, ham, pancetta, chorizo, proscuitto, mortadella, soppressata, pepperoni all work well.
✔ Sticks- Add bread sticks or cheese sticks for texture, flavor and height.
✔ Crackers- Opt for different sizes, colors and flavors. Cheese crisps are a great salty GF and keto-friendly addition. Pretzel sticks are also an option.
✔ Cheeses- Mozzarella cheese balls, cheddar, swiss, Monterey jack, feta, brie or Parmesan are ideal. Goat cheese or blue cheese will be too soft so steer away from those. Stick to blocks of cheese rather than slices.
✔ Other: Cornichons, artichokes, and are also popular charcuterie staples but are very wet so I would skewer them if using.
*Honey or jams will not work well in your jars since they will make things soggy. Any cold cuts would work.
Add some mini cream cheese balls to your jars for an extra festive treat!
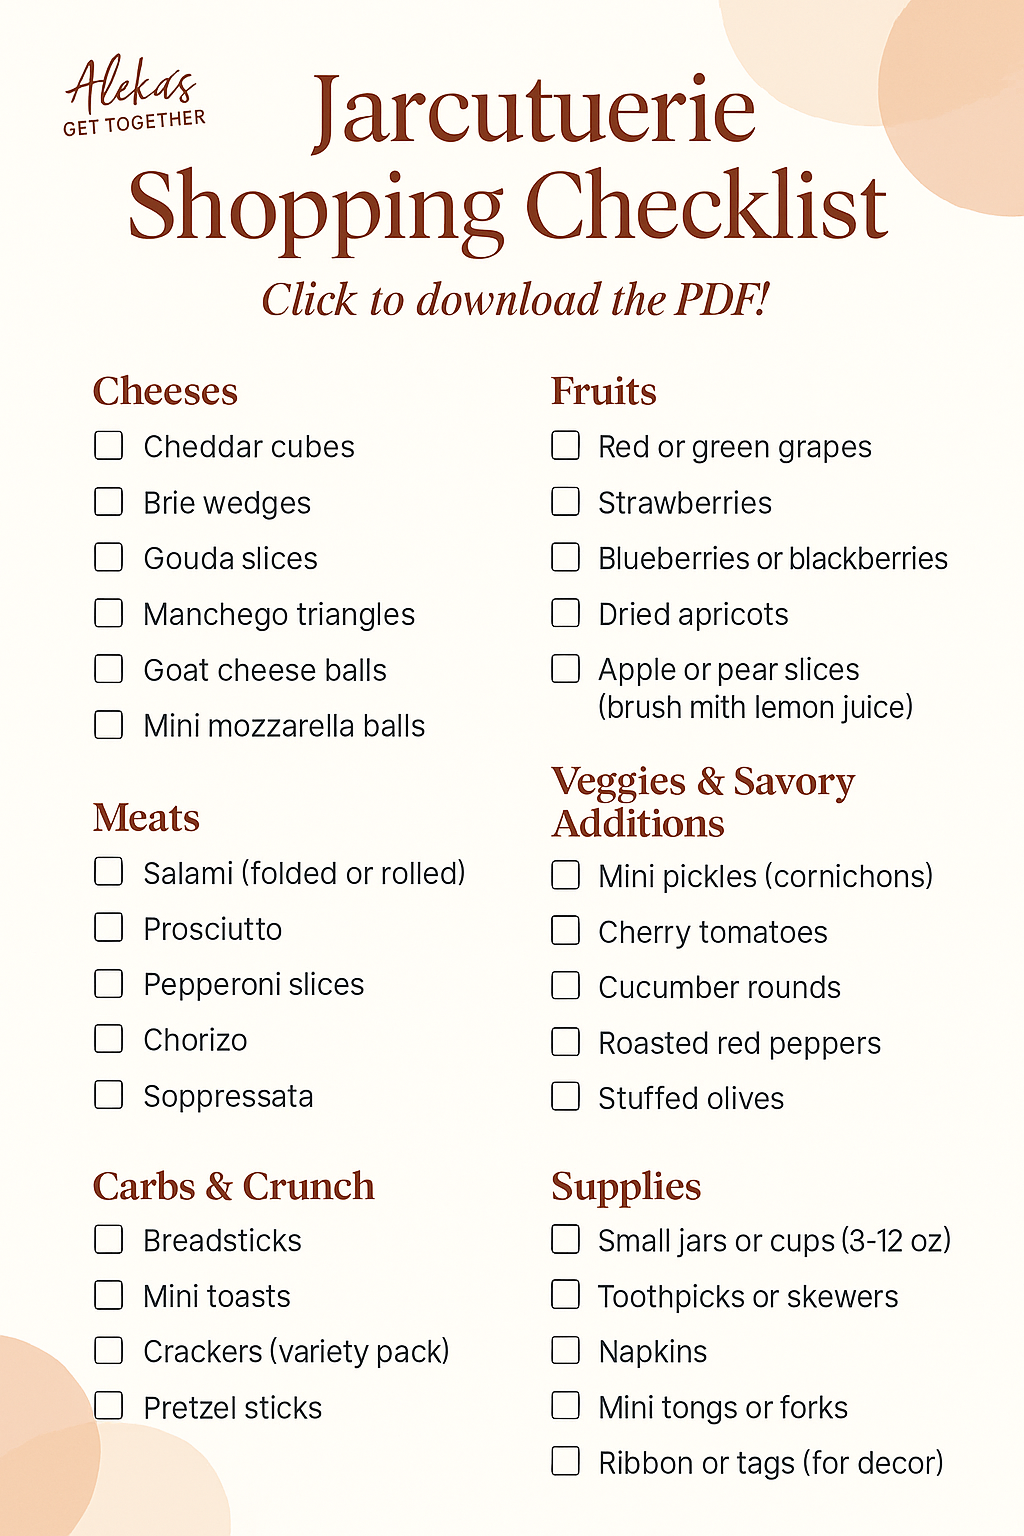
Free Jarcuterie Shopping Checklist!
Charcuterie Cup Tips
Charcuterie jars are ALL about the presentation. If it doesn't look beautiful, why bother? But it doesn't have to be hard! See my tips below to make them look perfect every time.
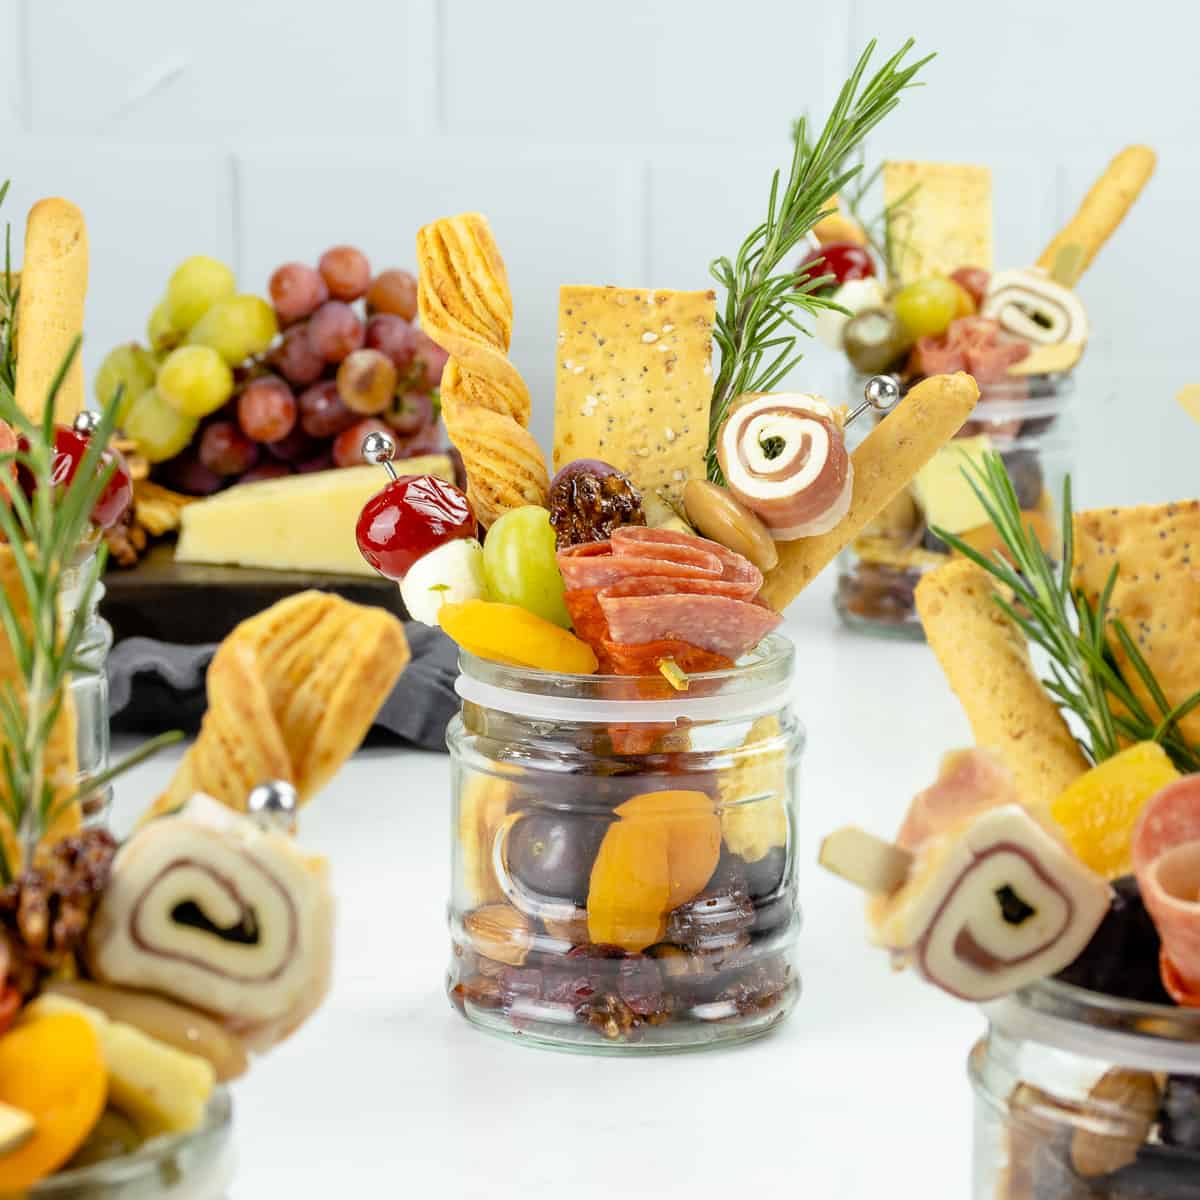
- Mix together different colors: Using red peppers/tomatoes, green herbs/olives, white cheese, dark plums/figs/grapes, and orange dried apricots add pops of color and make them beautiful.
- Use different textures: Swirly breadsticks and pinwheel cheese/proscuitto draws the eye in and makes for a more interesting jar! Soft cheeses, olives and crunchy crackers or breadsticks give guests lots of fun textures to enjoy.
- Add height! Adding breadsticks, herbs like rosemary and long crackers can add plenty of height to your jars making them much more impressive looking.
- Mix up flavors- Make sure to add sweet and salty snacks in the jars! Candied walnuts, Parmesan crackers and fruits are a great mixture of sweet and salty that people crave.
- Consider sizes- Add the smaller items like almonds or nuts at the bottom of the jar first. Large items can sit on top or be skewered.
- Prevent soggy snacks- Keep wet snacks like olives and peppers away from the crunchy items to prevent soggy food. Add them to skewers so they don't touch anything else.
- Fold your meats- Folding your salami or pepperoni into a fan makes it more pleasing to the eye and easier to skewer.
- Use blocks of cheese- Get fancy with cutting your cheese since these are all about presentation.
- Precision counts- Think about the appropriate thickness of everything to suit the jar and your guest's mouth.
- Individual containers- Make sure to use the right jar. 4-ounce jars are the minimum size I recommend but you can go as large as 6 oz.

Making These In Advance
The best thing about charcuterie appetizers are the different textures. So we definitely want to maintain the crunch-factor here.
Since the breadsticks can get stale and the cheese/meats can dry out, you don't want to make your jarcuterie cups too far in advance.
With that said, you can prolong their freshness by holding off on adding the crackers and rosemary sprig. This will allow you to easily cover each jar with plastic wrap or foil. Then, an hour or two before, add your breadsticks, crackers and garnish!

FAQ's
Since you cannot close the jars, you should line a sheet pan with saran wrap or a silicone mat. This will prevent the jars from sliding around. Then add them to the sheet pan and place in the fridge for up to 3 hours.
Bigger jars will be better than smaller. Opt for at least 8 ounces.
Other Party Snack Ideas For Your Next Gathering!
EASY Kids Charcuterie Board (For Parties)
Glazed Holiday Pecans With Cinnamon and Brown Sugar
CRUNCHY Air Fryer Sweet Potato Chips
Jar-cuterie (Charcuterie Jars)
Ingredients
Equipment
Method
- Add your nuts and small dried fruit to the bottom of your jars.
- Then add in your larger dried fruit and small crackers or cheese crisps.
- Next, add your longer items like your breadsticks, cheese twists, crackers.
- Skewer your wet/cold ingredients. I prefer THREE skewers. Two with cheeses, olives and grapes. The third with your salami/pepperoni folded.*To skewer your pepperoni/salami in a fancy way, simply stack them and fold like a fan. Finally fold in half and skewer fanning the meat out.
- Lastly, fill in any gaps with colorful larger items like grapes, dried apricots or more crackers and add fresh herbs for a garnish and pop of color. (I used a long rosemary sprig.) Repeat with other jars.
Video
Notes
- Mix together different colors: Using red peppers/tomatoes, green herbs/olives, white cheese, dark plums/figs/grapes, and orange dried apricots add pops of color and make them beautiful.
- Use different textures: Swirly breadsticks and pinwheel cheese/proscuitto draws the eye in and makes for a more interesting jar! Soft cheeses, olives and crunchy crackers or breadsticks give guests lots of fun textures to enjoy.
- Add height! Adding breadsticks, herbs like rosemary and long crackers can add plenty of height to your jars making them much more impressive looking.
- Mix up flavors- Make sure to add sweet and salty snacks in the jars! Candied walnuts, Parmesan crackers and fruits are a great mixture of sweet and salty that people crave.
- Consider sizes- Add the smaller items like almonds or nuts at the bottom of the jar first. Large items can sit on top or be skewered.
- Prevent soggy snacks- Keep wet snacks like olives and peppers away from the crunchy items to prevent soggy food. Add them to skewers so they don't touch anything else.
- Fold your meats- Folding your salami or pepperoni into a fan makes it more pleasing to the eye and easier to skewer.



Tried the recipe? I'd love to hear your thoughts below!