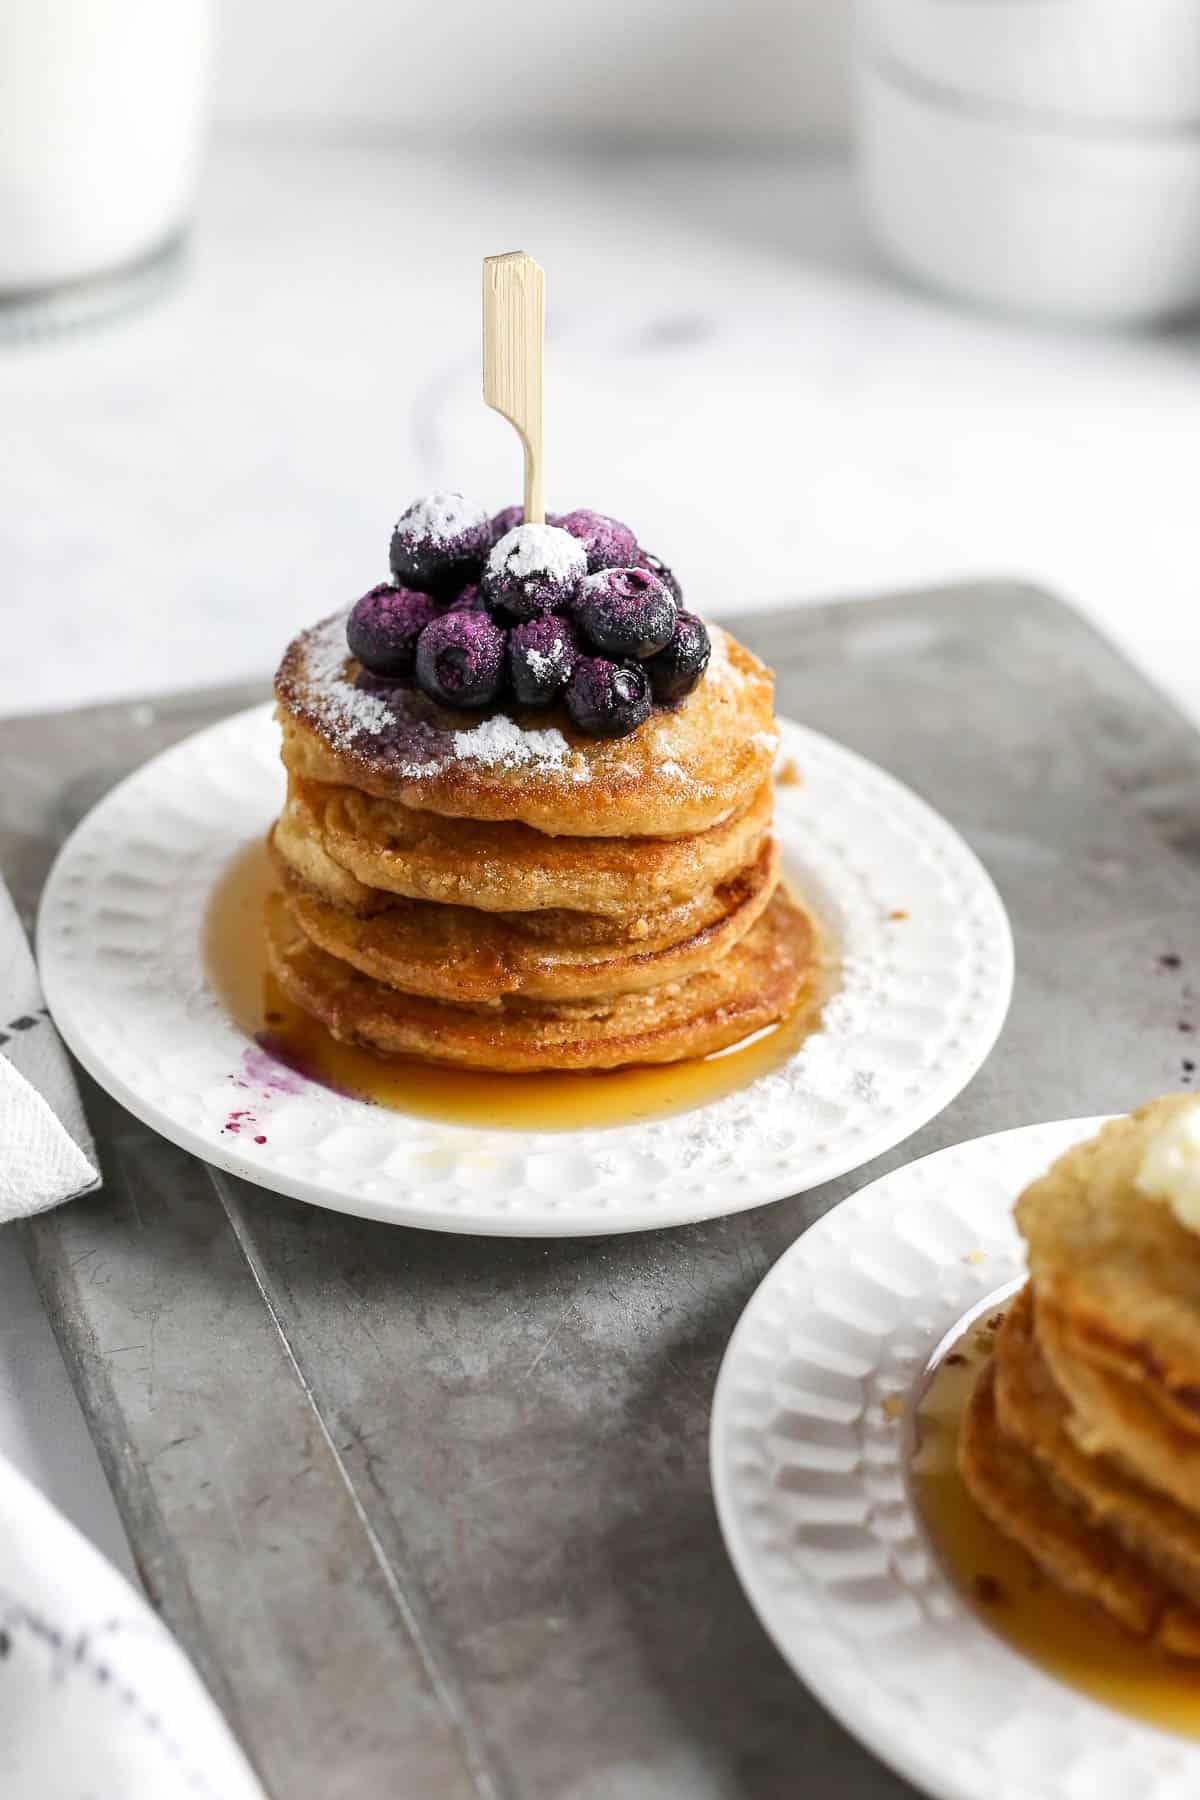
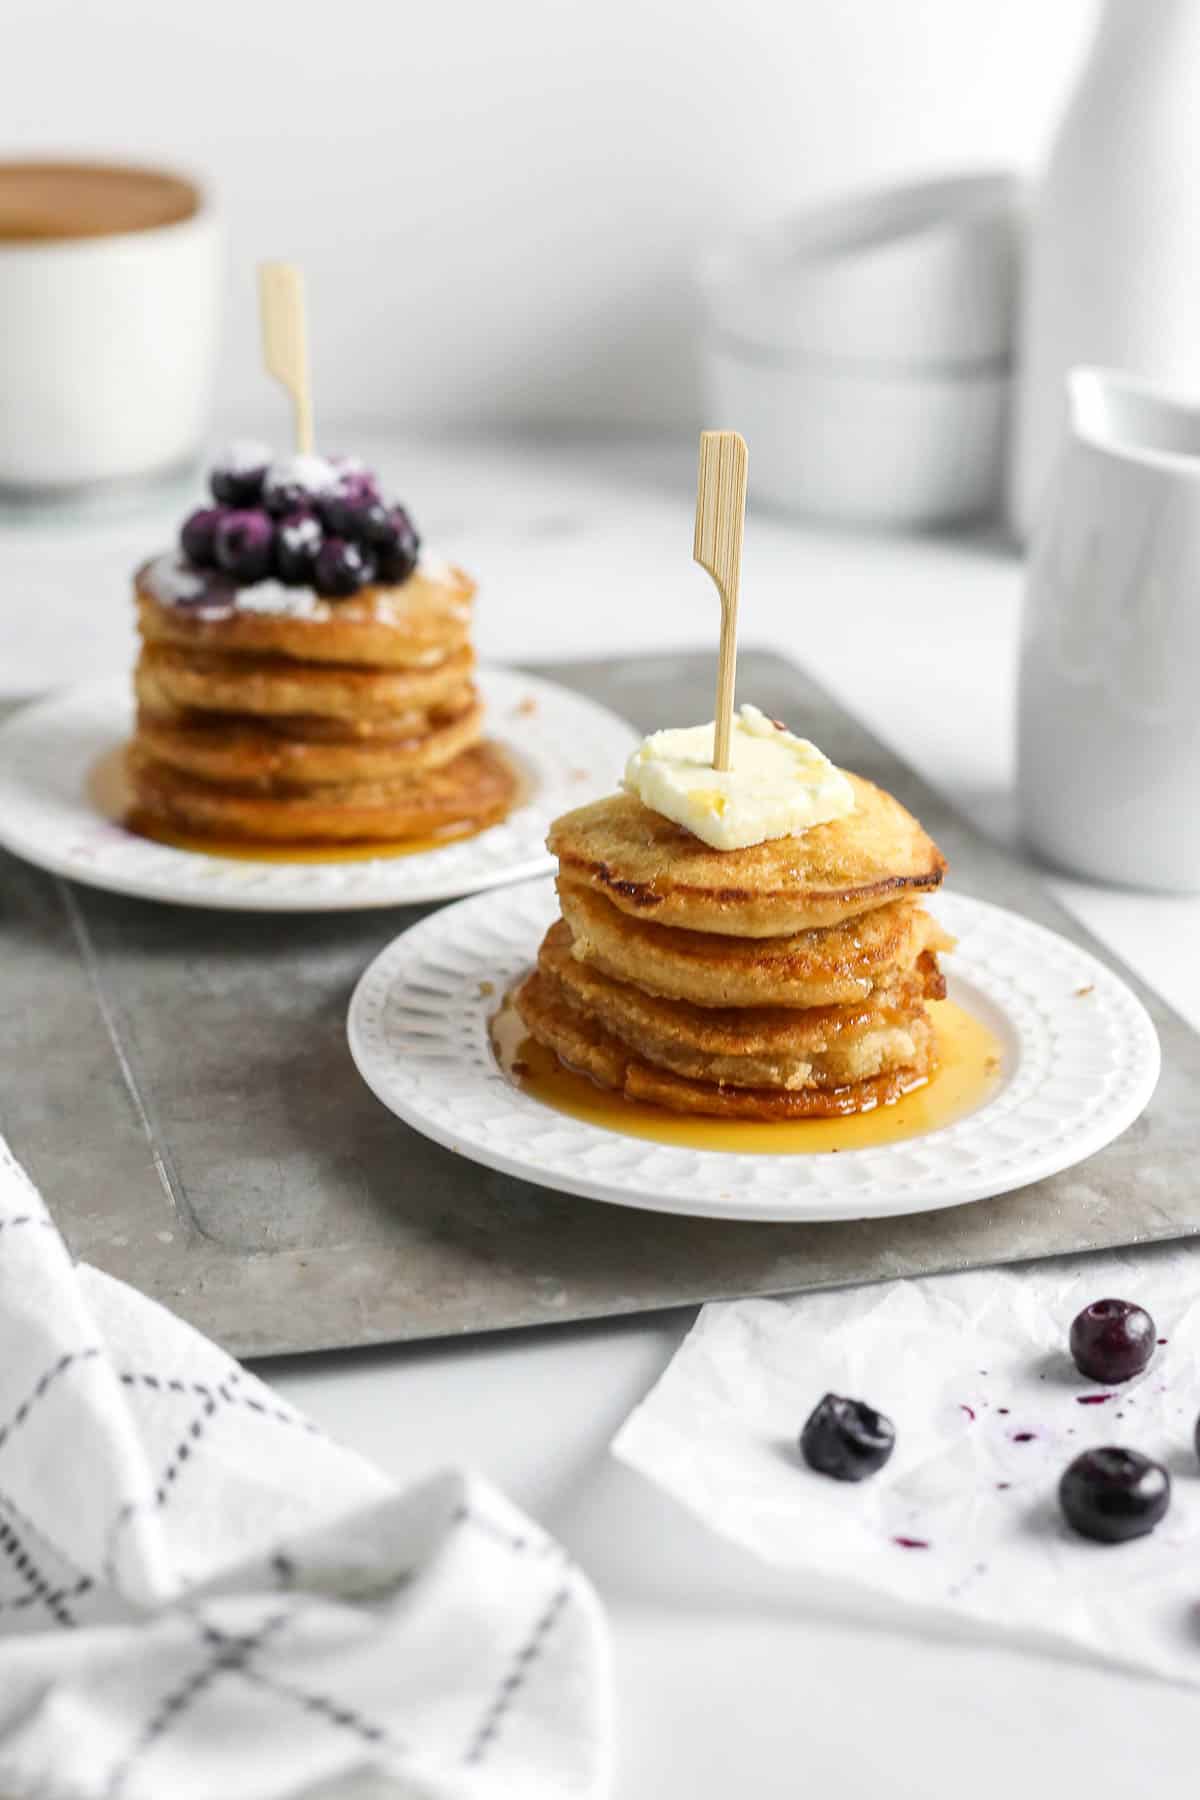
These Silver Dollar Pancakes are the BEST mini pancake recipe out there! It's the crispy edges that make these little guys stand out. The size of a silver dollar, they are easy to skewer and completely bite sized!
I love serving them for breakfast or brunch parties like bridal or baby showers because they keep warm for hours and look so cute skewered!
If you're looking for another breakfast recipe to serve to a crowd, try my Hawaiian Roll French Toast!
Silver Dollar Pancake Recipe
These mini silver dollar pancakes are one of my most popular recipes for good reason. (My Starbucks Copycat Egg Bites are another morning favorite!)
"Silver dollar" pancakes are called silver dollars because they are simply SMALLER pancakes! Smaller sized pancakes can also be called hotcakes, flapjacks, griddlecakes or mini pancakes.
They are often served stacked on top of one another especially in diners and measure about 2"-3" in diameter whereas, regular pancakes are at least 6" in diameter.
So if you're looking for a fun breakfast idea, get your griddles ready because these mini pancake stacks are not only fun to eat but so tasty! Mini, fluffy and crispy on the edges...what more could the kid in us want?
Have you tried my mini custard tartlets yet? They are also great for serving at brunch since they do not have to be warmed.
Jump to:
?Ingredients
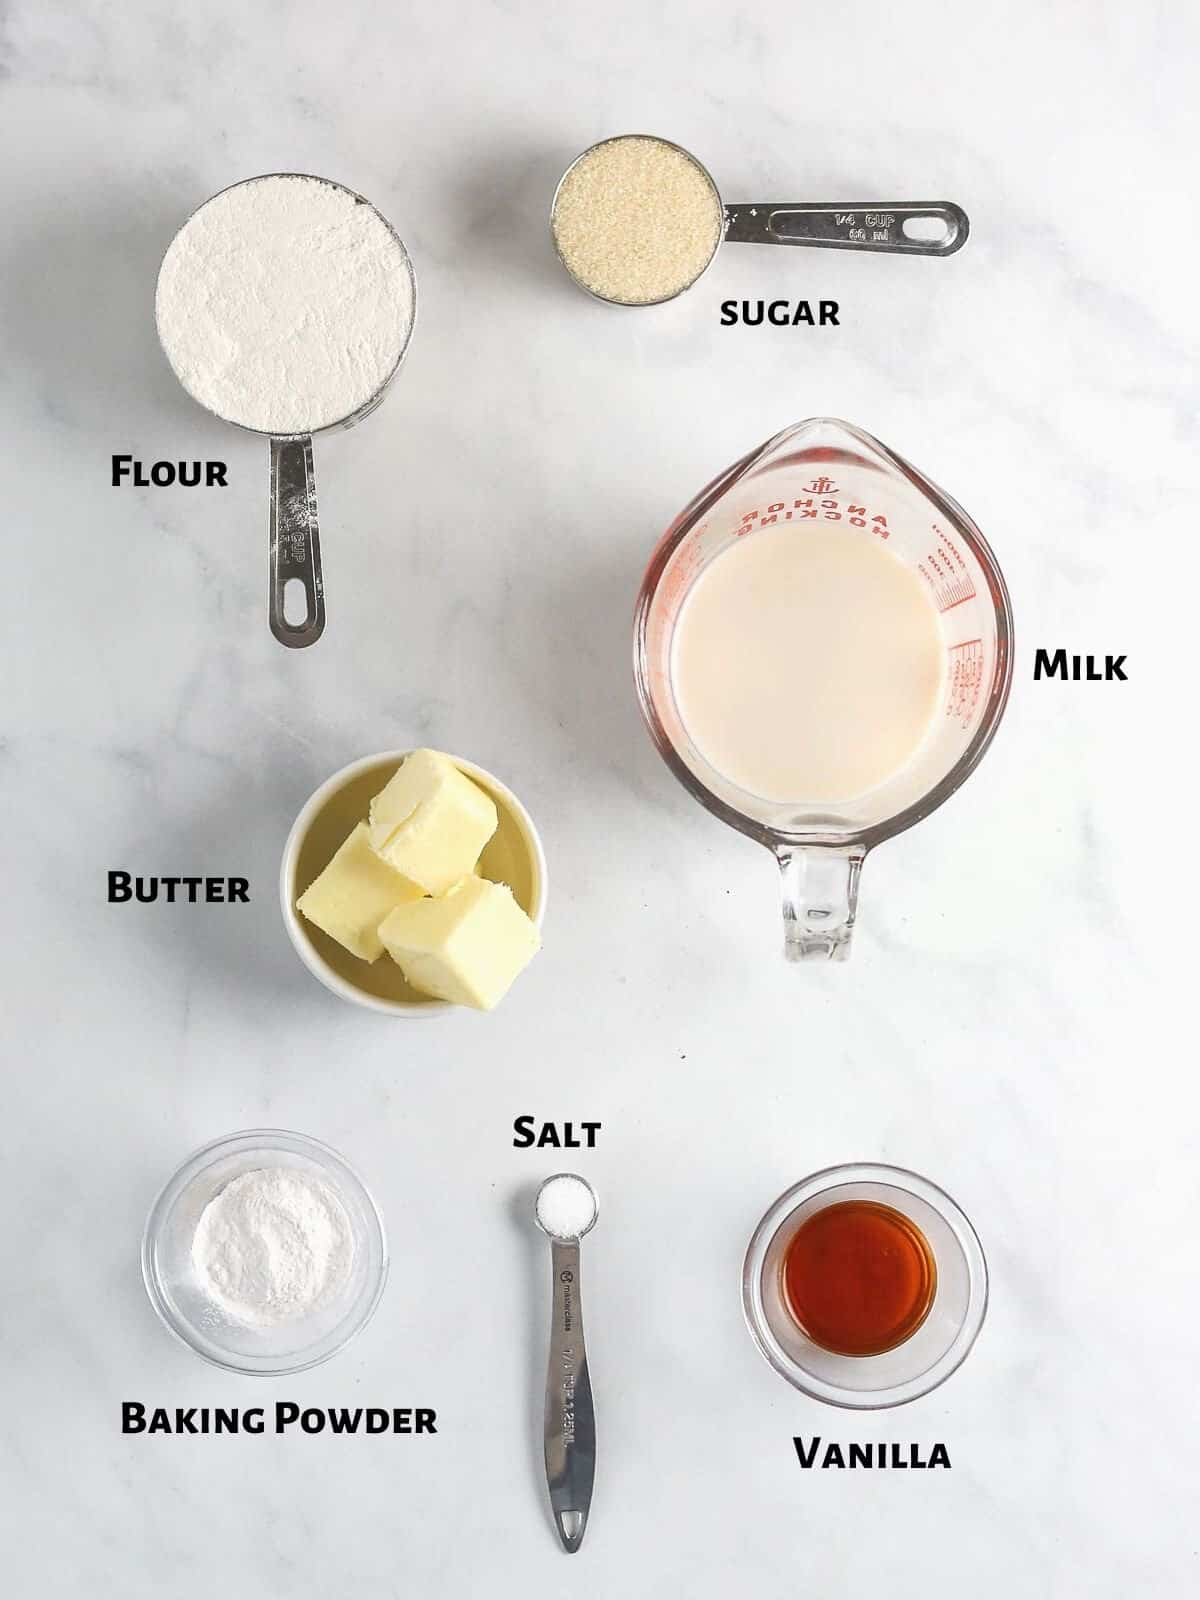
- Flour: I use all purpose flour but you can swap GF flour or almond flour however know the texture will be different.
- Sugar: Pancake batter needs sugar. I prefer to use more in the batter and less syrup in the end. As for the kind of sugar, I use granulated white sugar but any sweetener works.
- Milk: I use whole milk but you can also use buttermilk for a tangy flavor.
- Vanilla: Vanilla extract adds a yummy flavor and is a must for diner-tasting flapjacks!
- Baking Powder: This is the leavening agent and will help make your pancakes thick and fluffy.
- Butter: Adding butter to the batter makes a big difference. Trust me. Don't leave it out. Unless your vegan. Then maybe a vegan butter will work.
- Eggs: NONE! This recipe is egg-free!
?How To Make Silver Dollar Pancakes
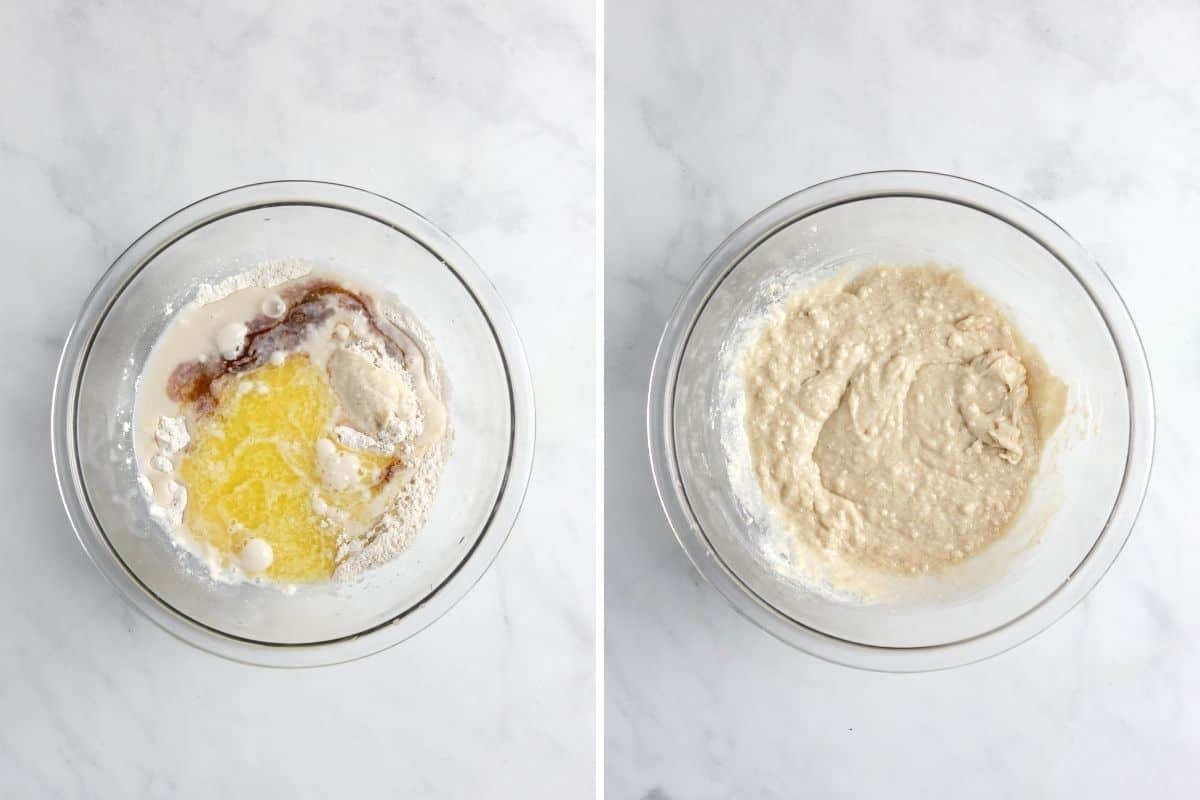
- Add your wet ingredients to a large mixing bowl and whisk.
- Add in your dry ingredients and mix until JUST combined. Lumps are okay!
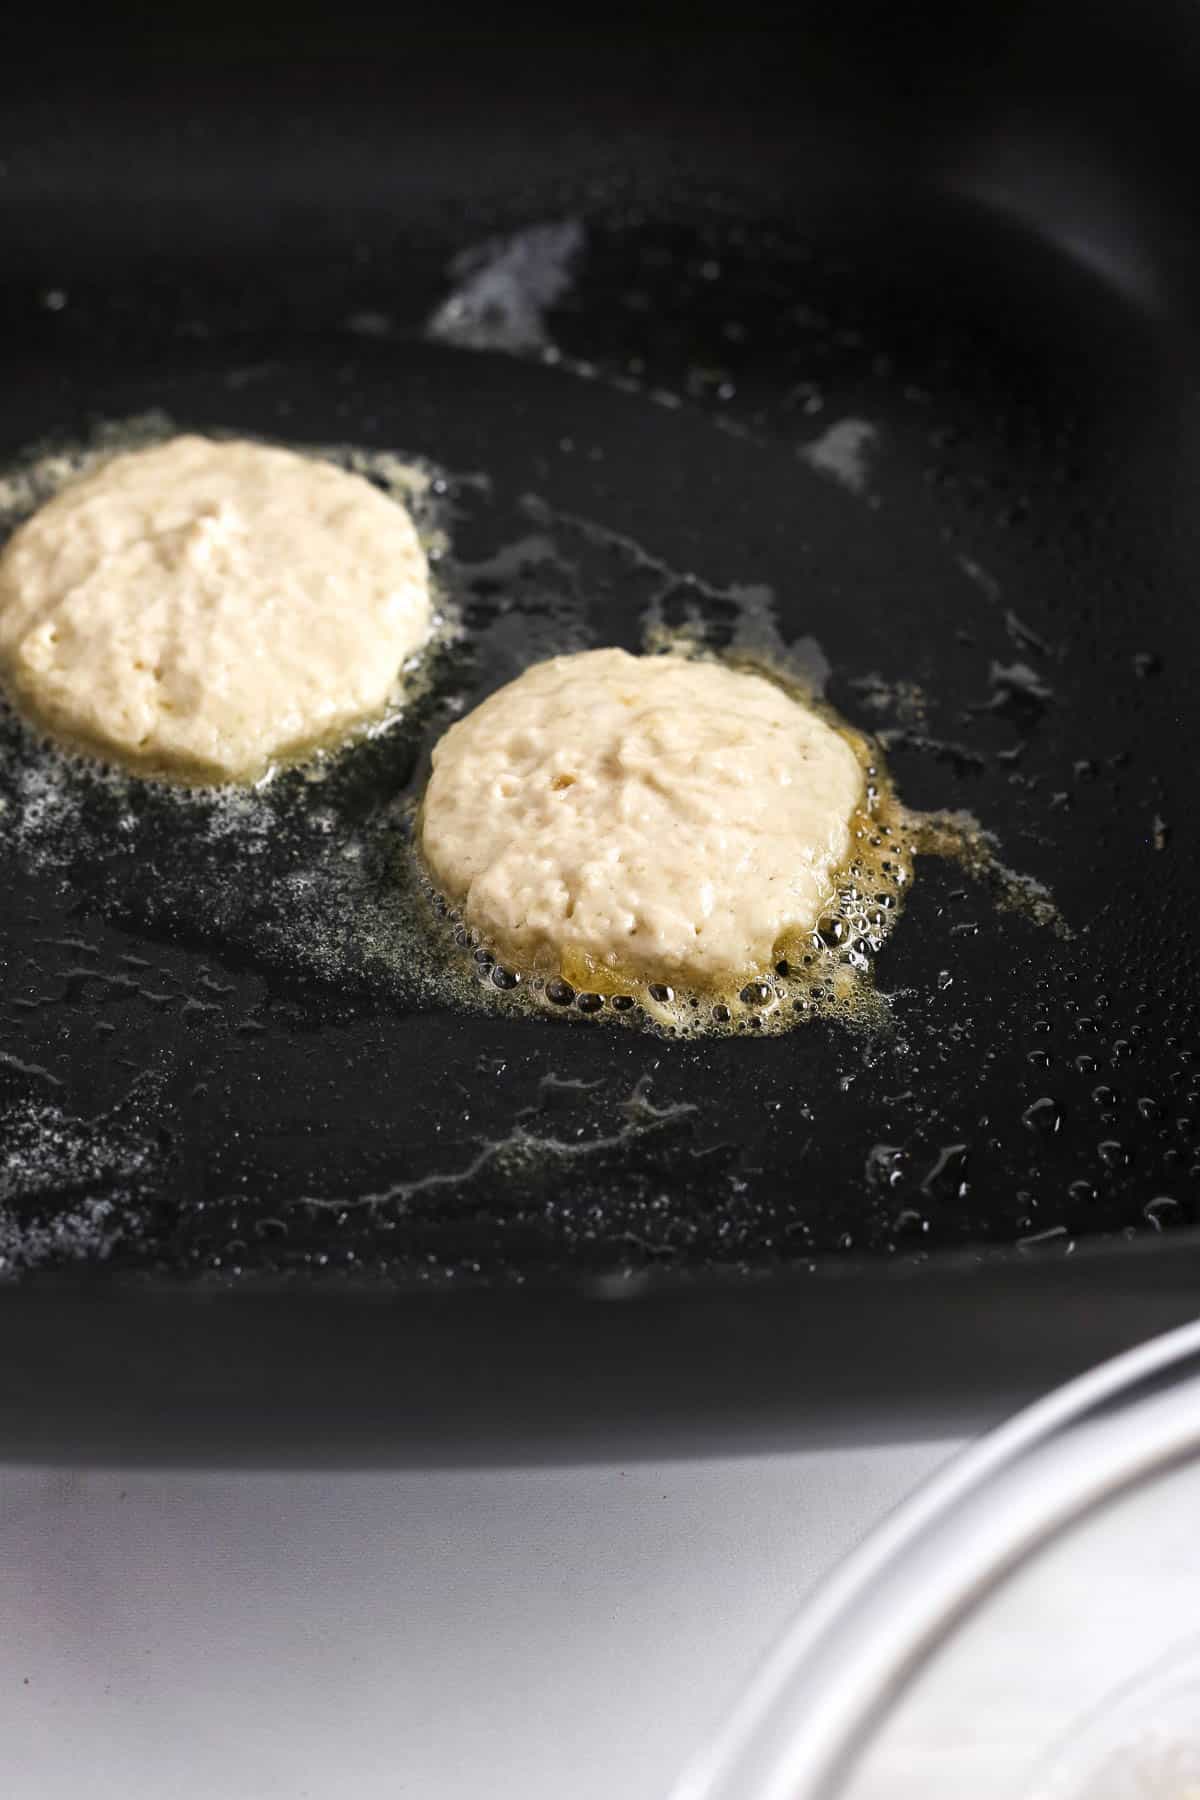
- Set a skillet or griddle over medium to medium-high heat.
- Use a mini ice cream scoop to scoop about 1 oz. of batter onto the hot griddle.
- Flip the pancakes until the top is bubbly and edges are golden brown. This should take just a few minutes.
- Serve hot with butter and maple syrup.
?Substitutions & Pancake Add-Ins
Feel free to add in ingredients such as:
- fresh fruit like strawberries, blueberries, pineapple, bananas, or peaches
- mini chocolate chips
- cocoa powder (like I use in my chocolate milk pancakes!)
- walnuts or pecans
- toasted coconut
- whipped cream
- chocolate syrup
- cinnamon or pumpkin pie spice
Pancake Topping Ideas
- Fresh berries
- Brown Sugar Syrup
- Preserves or jam
- Butter or Brandy Butter
- Maple syrup
- Bourbon whipped cream
- Pumpkin whipped cream
✔️Expert Tips
I have tested these mini silver dollars over and over and OVER again. Little did I know how temperamental pancake batter was! But have no fear, they are not difficult to make. Just follow my tips are they will turn out perfectly every time!
- Use butter and don't be stingy!! I don't think people understand how much butter is used for those yummy 'diner pancakes' we all have come to love. Butter will make your pancakes delicious period. Don't skimp. The more fat in your pan, the CRISPIER the edges. (You can always use olive oil if you want to cut down on the fat.)
- Start your skillet on medium low heat! High heat is never smart. The pancake will burn before the inside cooks!
- Use a non-stick skillet to prevent your little pancakes from sticking!
- Be patient. Don't mess with your small pancakes until they're ready to flip! Wait until you see little bubbles in your pancakes. This means they are ready to flip!
- Use a THIN METAL spatula or a little spatula. I find the big plastic spatulas to be too thick. They do not slip underneath the pancake as easily and will mess up your perfect mini pancakes!
- Don't overcook them. They will become dry. After you flip them, they should not take much longer to cook through. Just run a knife through the center to check if they're done!
- Do not over-mix your batter! When you over-mix flour based batters, you create gluten which causes chewier, tougher food, not light and airy like we want. When you add your ingredients to a bowl, mix gently with a whisk! Little lumps of flour in your batter are OKAY.
- Measure your ingredients precisely! When it comes to batters, precision matters. Level out your flour and baking powder! Use an accurate measuring cup for your milk. It WILL make a difference. You want a thicker batter for THICK pancakes!
- Use a mini ice cream scoop! Scooping just a tablespoon of batter will give you perfectly round and consistent cute little pancakes every time! If you don't have this, use a TABLESPOON measure instead!
- Do not use cooking spray! Cooking spray will only lightly coat your pan. In order to get crispy edges, you will need a nice layer of butter or oil on the bottom of your skillet. (1-2 tbsp)
Serving Silver Dollar Pancakes
Although I could eat these cute little pancakes ANY time of day, I love them in the mornings since our family is always on the go. My little ones love them because they don't need forks or even maple syrup to enjoy them.
Other special occasions I have served them at are:
For Brunch!
Brunch is one of my most favorite meals of the day! Pancakes for brunch is encouraged so why not serve these with some bagels, these healthy banana walnut muffins and some fresh fruit!
At A Bridal or Baby Shower!
These would be delicious served in large chafing dishes in mini stacks with a toothpick in the center. Think catering style. Also think about serving my blue baby shower punch or these pink strawberries for a girl's shower!
Serving Tip* Make your mini pancakes ahead of time and add them to a chafing dish or an electric food warmer to keep them warm throughout the entire party!
Slumber Parties!
Slumber parties are so fun but can be hectic! Make these mini pancakes with the kids and keep them warm for a late night snack or serve these in the morning with some whipped cream and fruit! OR for the adults, my bourbon whipped cream!

If you love this pancake recipe, you must try my Deep Fried Oreos! They taste like a pancake and cookie had a baby. 🙂
Freezing Tips
These mini pancakes freeze VERY well!
Once your pancakes are fully cooked, add them to a large freezer bag or Tupperware container and freeze them for up to 6 weeks.
- Make sure to squeeze out as much air as you can to prevent from freezer burn.
- FLASH freeze your mini pancakes so they do not stick to one another. This is super helpful when your in a rush in the mornings!
Reheating Tips
You can reheat your pancakes one of THREE ways:
- microwave
- pan
- oven
I highly recommend using the microwave especially if your in a hurry. They come out delicious and take about 1 minute of reheating.
Done and done! 🙂
If you want to "RE-CRISP" them, add a pad of butter to a hot skillet and toss them around a bit. You just want to warm them through, not dry them out.
The oven is useful if your reheating them in LARGE batches and if you want to maintain those crispy edges. This is ideal if your hosting a brunch party for a crowd. Oh and don't forget to serve with some butter, fresh fruit and/or maple syrup drizzled over the top of each pancake stack.
FAQ's
Pancakes need a leavening agent to help them rise and fluff up! This could be baking powder, baking soda, eggs or a combination of all. Without at least one of these, your pancakes will not be thick or fluffy. If you used baking soda or baking powder and your pancakes are STILL turning out thin, check the EXPIRATION DATES on both! Baking soda and baking powder can go stale after 6 months to a year so make sure they are not expired!
You need to add more butter to your pan and SWIRL! The edges need fat to get crispy.
Think about using a nonstick skillet. If you don't have one, use plenty of butter and a thin spatula to flip them. Wait until they brown slightly on the edges before you flip them.
Here are some other fun breakfast bites:


Mini Silver Dollar Pancakes
Ingredients
Method
- In a large bowl, combine your dry ingredients.
- Add in ¾ cup milk, 2 tablespoons melted butter, 1 tsp. vanilla and using a whisk, mix until JUST combined. DO NOT OVER-MIX! Lumps are OKAY!**The consistency of your batter is important. If your batter is too thin, your pancakes will turn out thin and be hard to flip. If your batter is too thick, you can add 1 tablespoon more of milk at a time until it thins out.
- Add 1-2 tablespoon of butter to a skillet and turn heat to medium-low. When butter is melted, pour about 1 tablespoon of batter into your skillet leaving about an inch between each pancake. (I suggest using a mini ice cream scoop for perfectly round, evenly sized pancakes).
- If you want super crispy edges, it is important that you use the handle of the pan to help move the butter AROUND the edges of each pancake! You want the perimeter of each pancake to be nicely coated in the butter! *Use more butter if your pan is larger.
- Once you start to see tiny bubbles coming through each pancake, or the edges start to brown, take a flat metal spatula (they work best) and quickly flip each pancake over and leave them alone! The time will differ depending upon your heat. It is always better to start the heat lower and adjust as needed!!
- It is also important to add another tbsp. of butter to the pan when you flip them. You do NOT want your pan to dry up. The pancakes should be able to freely move or slip around the pan when you shake it. If they do not, you need more butter.
- After you flip, they will be ready in another minute or two. You want to make sure the inside is cooked before you remove your pancakes but do not over-cook them or they will be dry.
- Enjoy as is or with desired toppings!
Nutrition
Video

Notes
- These freeze VERY well! Make a large batch, let them cool and throw them in a large Ziploc bag or Tupperware container and reheat for 30-60 seconds in the microwave!
- Feel free to adjust the heat on your pancakes. You do not want the heat too high or they will burn before they cook inside! It is always better to start off with lower heat.
- Use a mini ice cream scoop to help make your pancakes the same size!
- If you're gluten-free, use GF flour!
- If you're vegan, substitute milk with choice of nut milk and butter with coconut oil.

Tried the recipe? I'd love to hear your thoughts below!